

Today, I'd like to share a tutorial on setting up Google Ads conversion tracking. Due to recent updates in the Google Ads backend, there have been some changes in conversion tracking settings, which may feel unfamiliar to some users. Below, I will share how to set up the new version of Google Ads conversion tracking.
Install Google Tag Manager
Before starting, make sure that GTM is installed on your website. Why use GTM instead of manually installing code snippets? Here are some advantages of using GTM:
Simplified tag management: Users can manage all tags through a single interface without having to modify website code directly.
Quick deployment: Tags can be quickly launched using pre-configured templates or custom code.
Seamless integration: Compatible with common tools such as Google Analytics, Google Ads, Facebook, etc., facilitating tracking and data analysis.
Reduced development: Marketers and analysts can manage tags independently, without relying on developers for modifications.
Set up conversion tracking in Google ADS backend
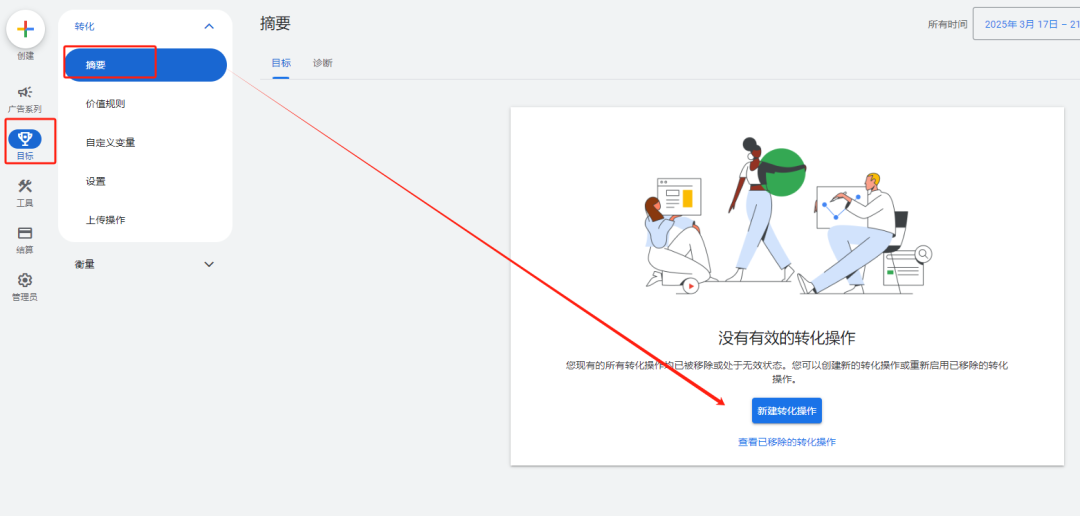
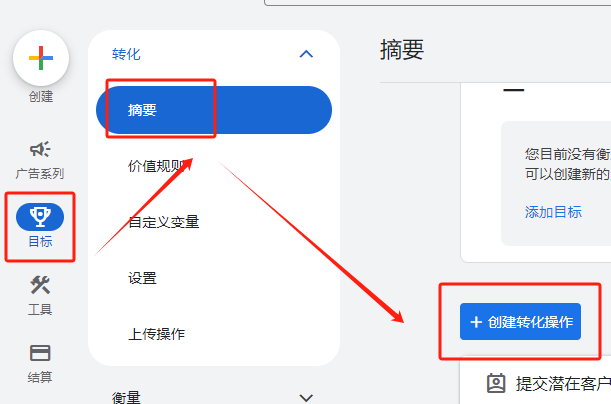
Here, I will demonstrate using a new ad account, as many older accounts may not have been updated yet. First, in the ADS backend, find 'Goals' on the left side, click on 'Conversions' and then 'Create new conversion'.
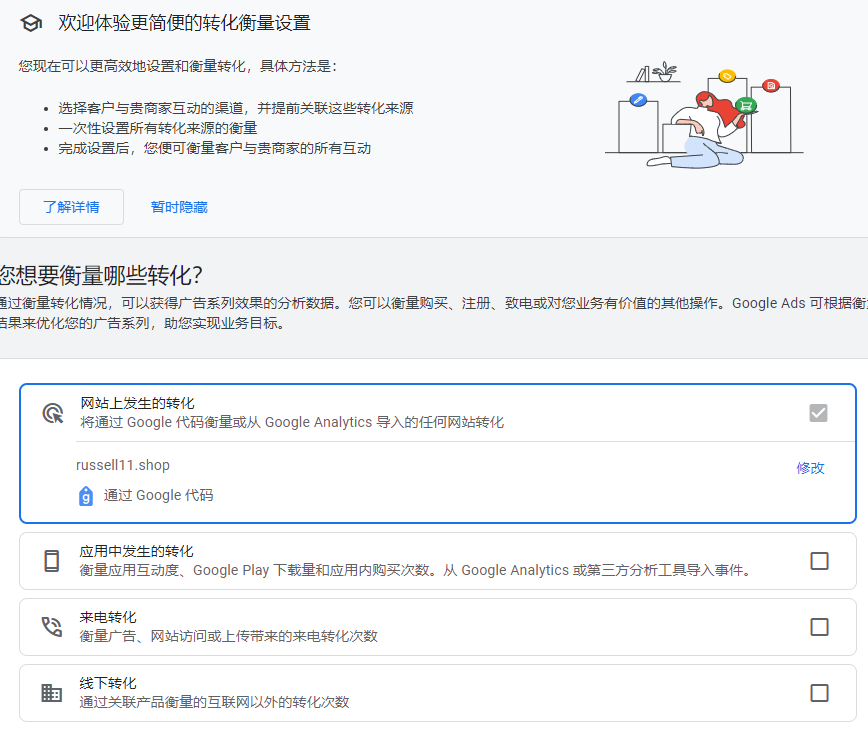
Below, we can see the updated conversion settings page. Select the first option for conversions that occur on your website. The default is Google code, but we'll ignore that for now and proceed to the next step.
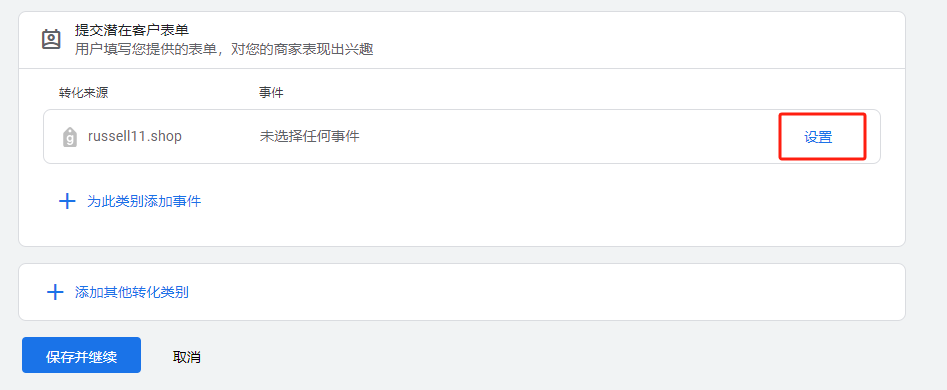
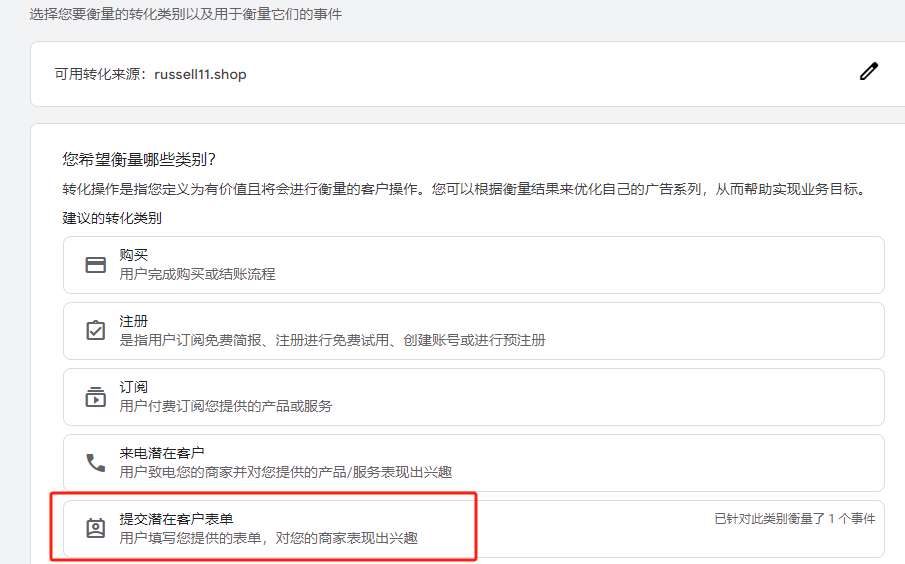
In the 'Choose conversion category' section, select according to your needs. For example, if you want to track form submissions, choose the 'Submit lead form' category.

After selecting the conversion category, click on the red box in the following image to set up the installation of this conversion event.
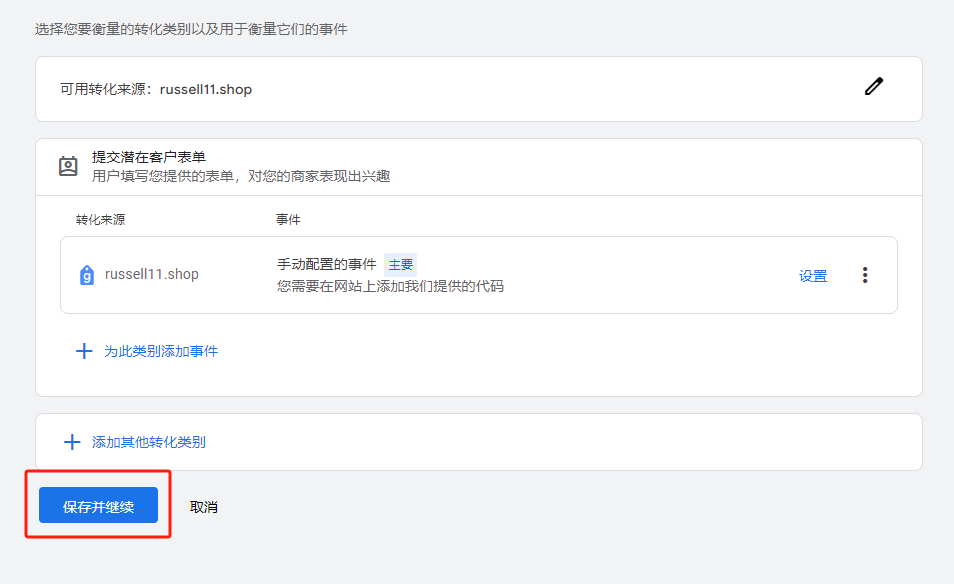
In the 'Create new event' section, select 'Create manual event', name the event, and then click 'Use event'.

The conversion settings interface hasn't changed; it's the same as before, allowing for primary and secondary operation settings, value, attribution, etc.

After completing the above settings, click 'Finish', save and continue.
Here, choose to use the Google tracking code machine, also known as GTM. Below, we will see the conversion ID and conversion label for this event, copy them as we will need them later.
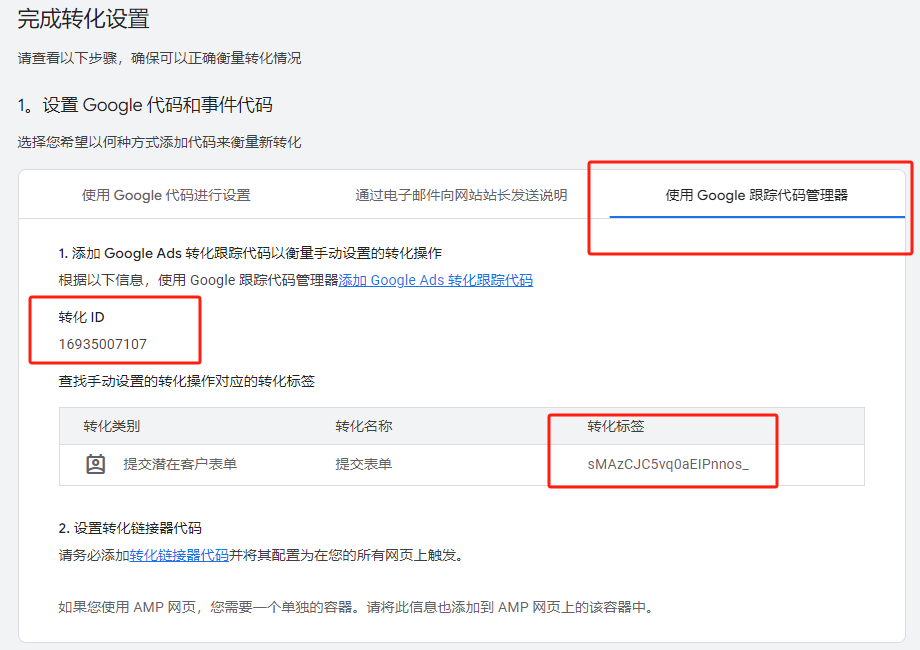
The above settings are done in the Google ads backend. Next, we need to set up this tracking code in GTM. Go to the GTM backend and follow the steps below.
1. Install Google AW code
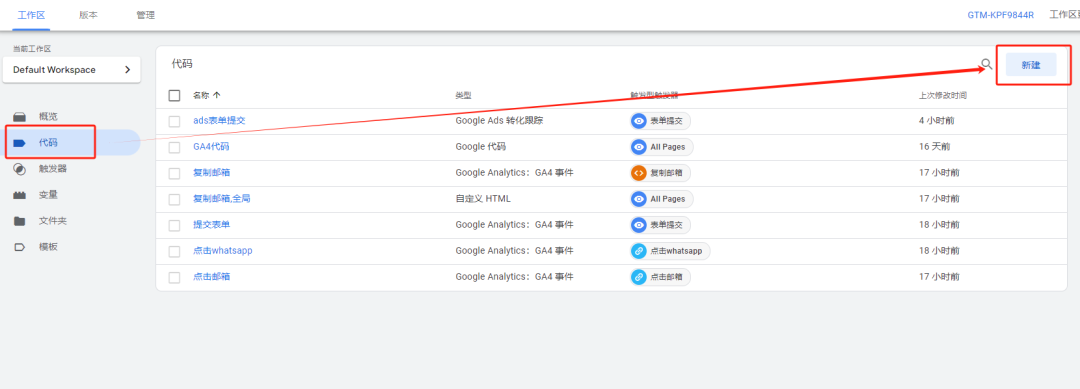
This AW code acts as a connector, similar to the global code used when installing GA4. In the GTM backend, find 'Tags' on the left sidebar and click 'New'.
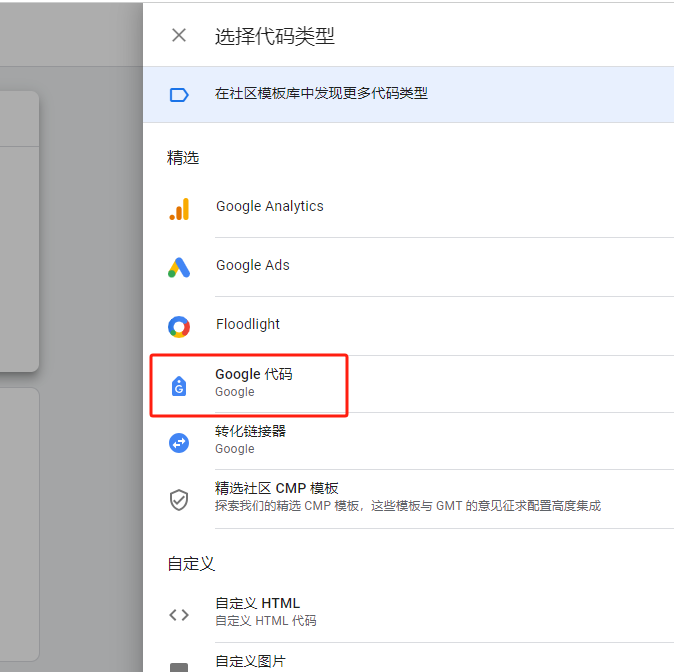
Click on 'Tag Configuration', select the type of tag, here choose the Google code as marked in the red box in the image below.
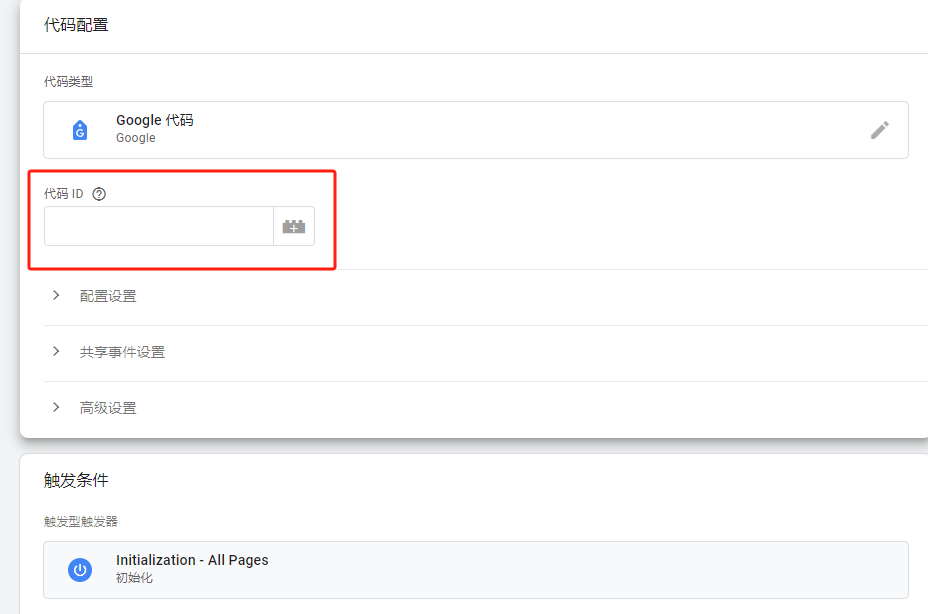
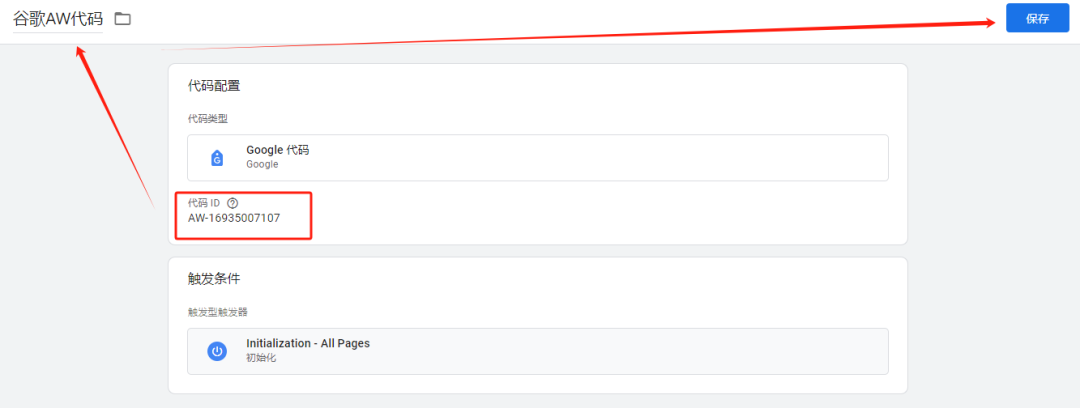
There is a code ID here, which is actually your Google Ads account number preceded by 'AW-'. Of course, we can also find it.
How to find the code ID?
Go back to the ADS backend, in the section where we just set the Google code and event code, select the first option to set up using Google code, and click 'View event code snippet'.
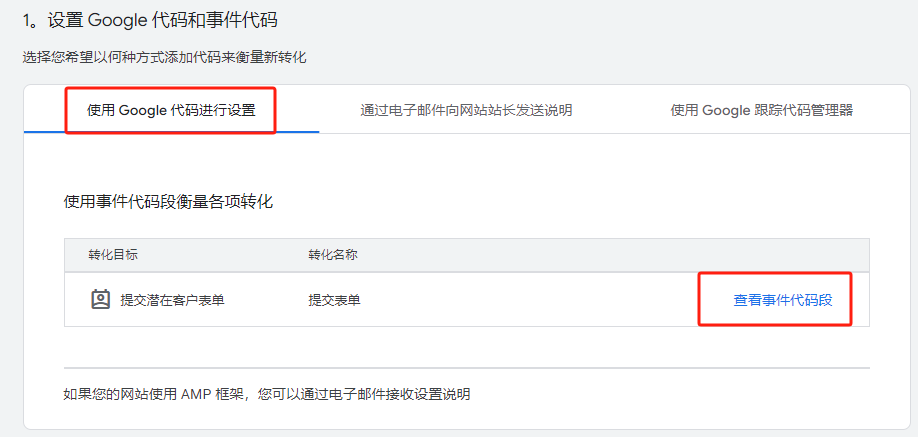
After clicking, we can see the AW code segment as marked in the red box in the image below.
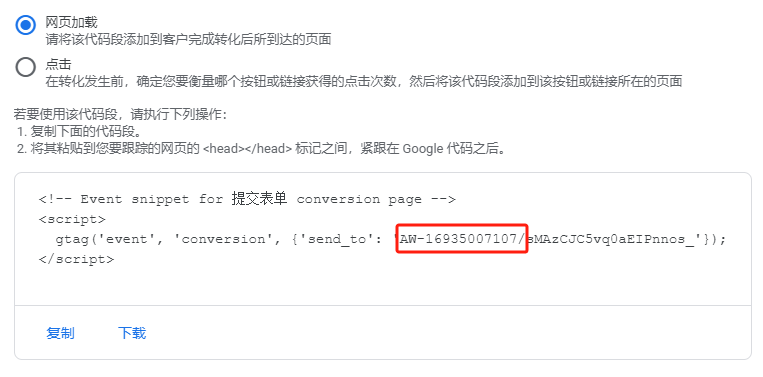
Copy and paste this ID into the code ID section. After setting, keep everything else default, name this event, and save. This way, our AW code is set up.
2. Install Google Code Converter
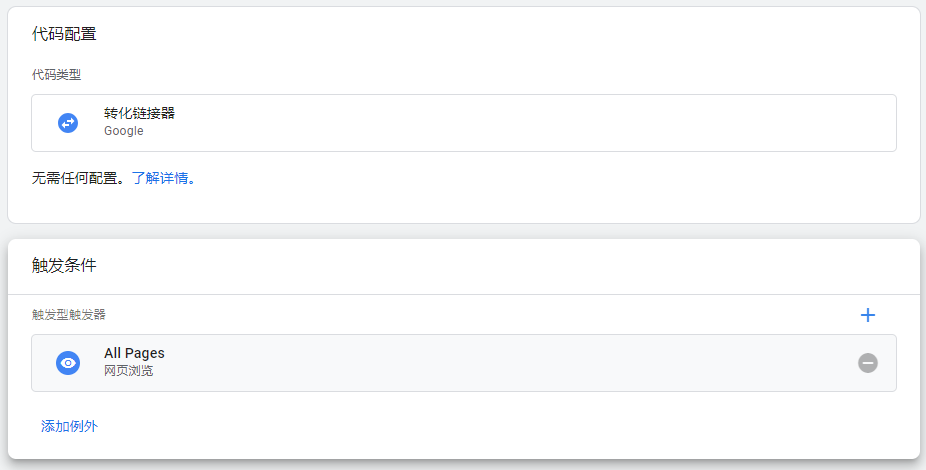
Before the update, when installing Google ads code, it would automatically pop up asking us to install this code converter first. Now, we need to manually install it. Similarly, in the GTM backend, find 'Tags', select 'New Tag', and choose the type of tag as 'Conversion Linker'.
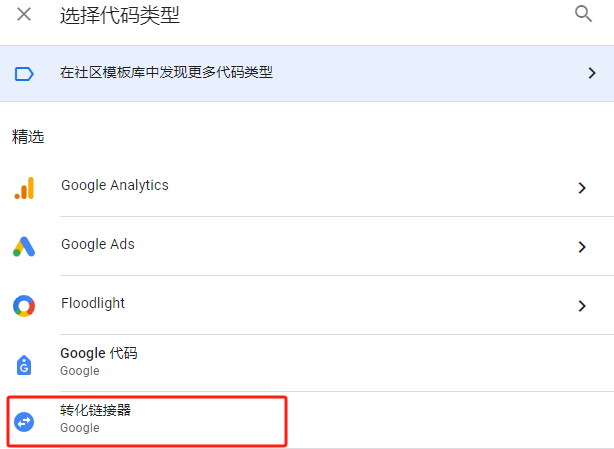
Select 'All Pages' as the trigger condition, name it, and save. This completes the installation.
3. Install Google Conversion Code
Next, we will install the code for submitting potential customer forms. First, set up variables and triggers as before; you can refer to my previous article on how to set triggers and other content. Here, I will directly show how to install the final code. Similarly, in the GTM backend, select 'Tags', create a new tag, and choose the type as 'Google ads'.
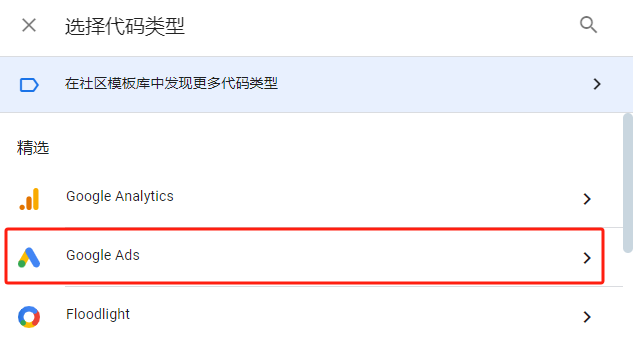
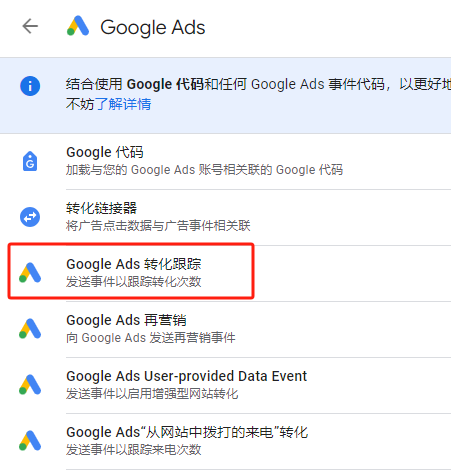
After clicking on Google ads, select 'Google Ads Conversion Tracking'.
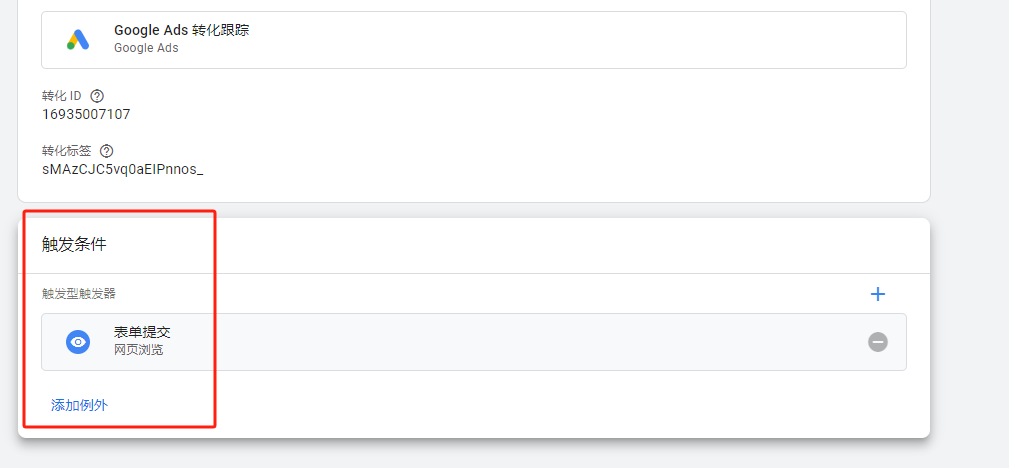
In the code settings here, there is a conversion ID and conversion label; fill in the conversion ID and label we copied earlier (from the screenshot before installing the Google AW code).
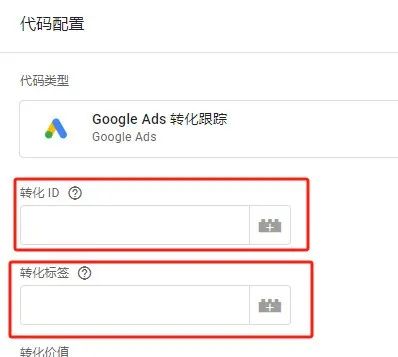
After filling in, select the trigger condition for form submission (already set up before).
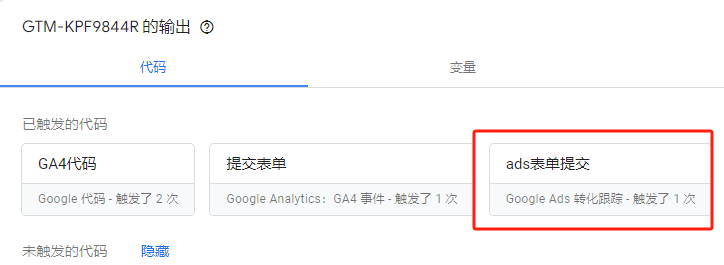
After setting, save, and this event's conversion code is set up. Then proceed to preview testing, and don't forget to submit after success.
Preview testing:
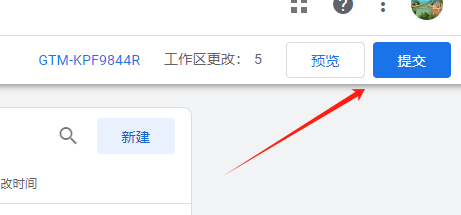
Submit:
How to directly export GA4 events to ADS backend
When setting up Google ads conversion, besides setting it up in the ADS backend, you can also directly import the well-set GA4 events into the ADS backend. The prerequisite is that you have set up the GA4 conversion events properly. How to set it up can also be seen in my previous article, just follow the steps. First, in the GA4 backend, associate ADS. After entering the GA4 backend, click 'Settings' in the lower left corner.
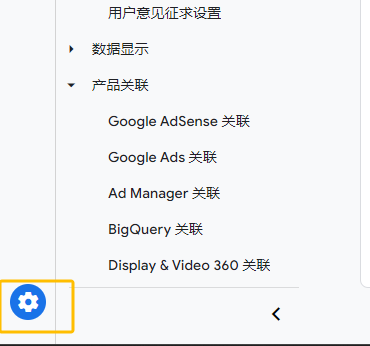
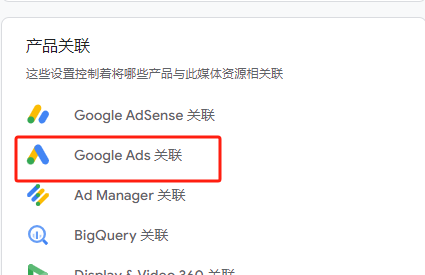
Find 'Product Links', click on 'Google Ads Link'.
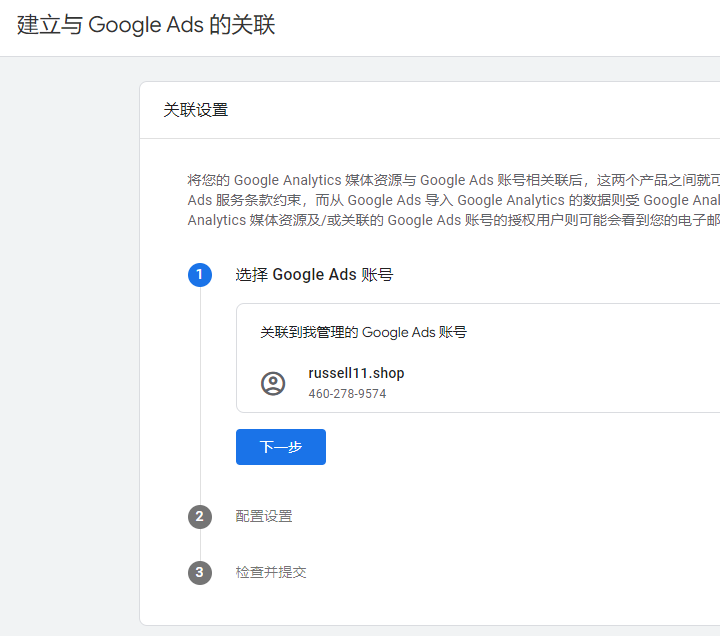
Select the Google ads account, be careful not to link the wrong ad account ID. Then click next, keep other options default.
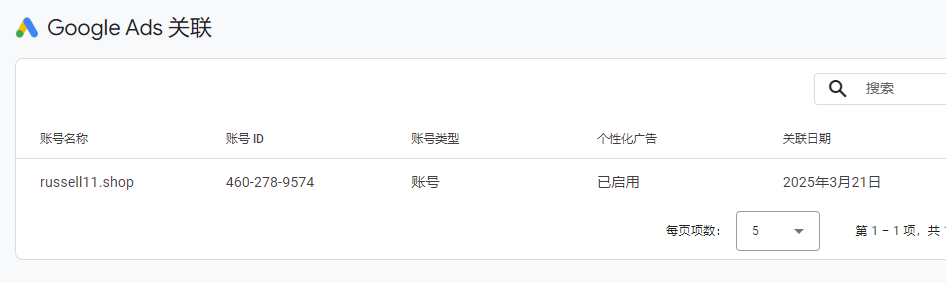
After successful linking, the following screenshot will show, indicating that the linking was successful.
Next, I will demonstrate how to import GA4 events into ADS. The operation has changed a bit after the update. Similarly, in the ADS backend, click 'Goals', select 'Conversions' in the summary, and click 'Create conversion action'.
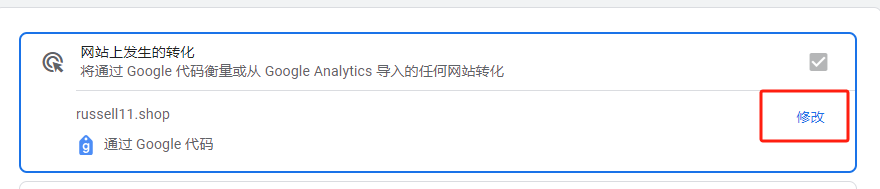
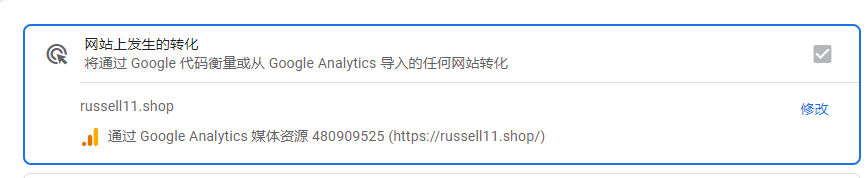
Here, also select conversions that occur on the website, click 'Modify'.
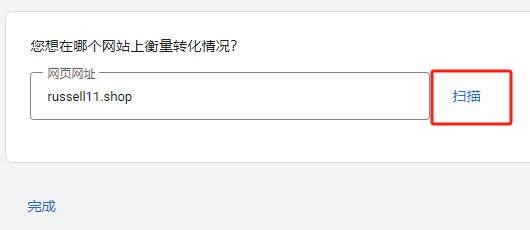
Here, it will ask us to scan the website first, just click 'Scan'.
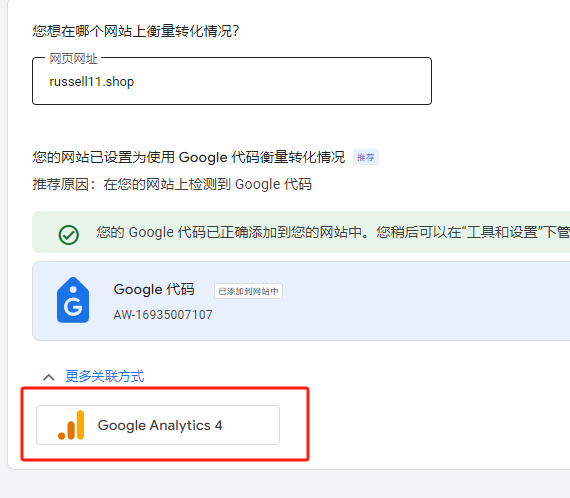
After the scan is complete, it will display Google code and GA4, click on the GA4 marked in the red box.
After clicking, I found that the position has switched to GA4, just click 'Continue'.
Here, in the 'Measure category' section, choose according to the event you set, for example, I still take the 'Submit lead form' conversion type, proceed to the next step.
Here, select 'Add event for this category', below will come out the GA4 option, click to choose.
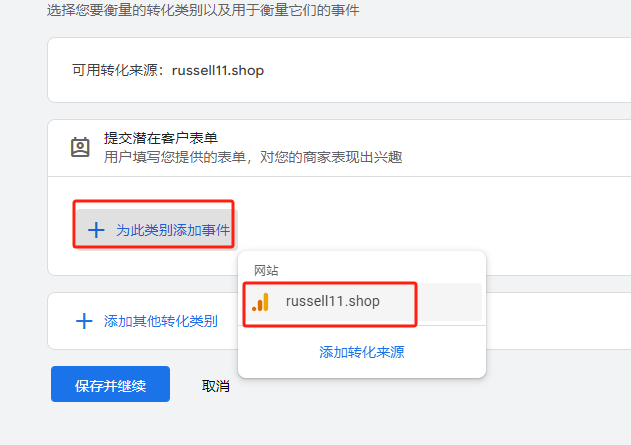
Here, you can see the events I set up in GA4, just select them.
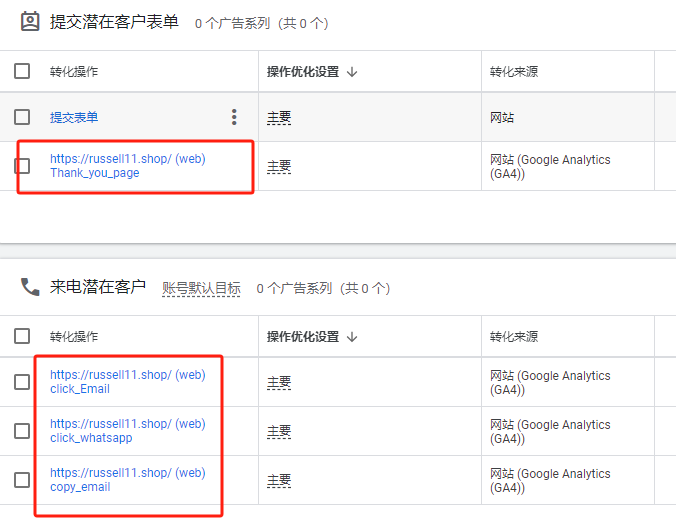
When importing, I can also directly add multiple conversion categories, such as customer clicks on WhatsApp, Email, Copy Email, etc., as shown below:
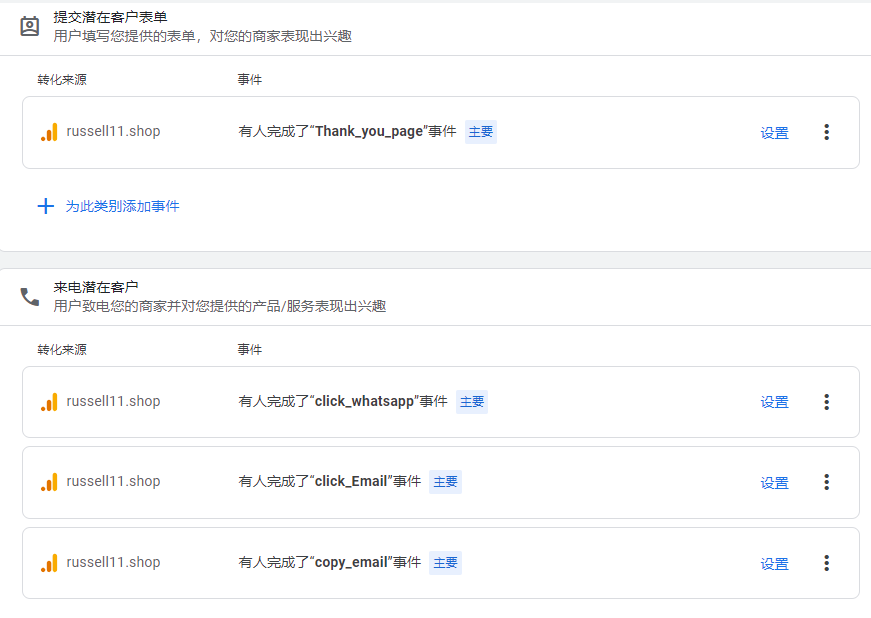
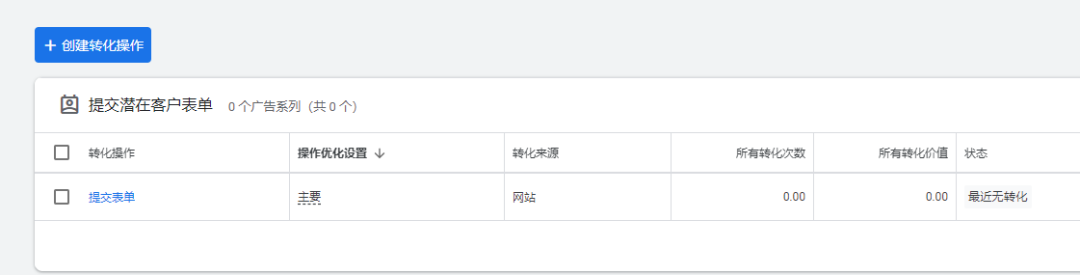
After adding, click 'Finish', and you can see the imported conversions back in the ADS backend.
Important settings after setting up conversion codes
These settings mainly apply to the second method of directly importing GA4 events into the ADS backend. If you used the first method, directly setting up in the ADS backend, you don't need to check these.
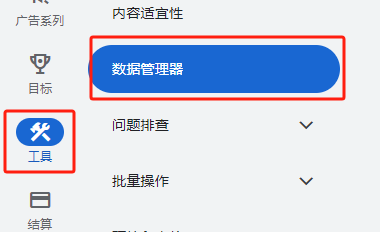
1. Check ADS backend data manager
In the Google ADS backend, click 'Tools', find 'Data Manager'.
In the 'Linked Products' section, we can see the linked GA4, click 'Manage and Link' behind it.